Showing posts with label Process. Show all posts

22.1.25


My beading mat today! I'm still finishing the colours for my Estella Kits, but I'm almost there! Gathering supplies took longer than the actual beading. The Eden green and rose gold (half a pair) are missing, and the turquoise is finished only. Now they're all complete! Wish me luck with the photos tomorrow – natural light would be best. Here's a quick look at my setup.


21.1.25

Anyone who uses social media for business knows how much work it is to organize your photos, especially if you've been putting it off for a while. From now on, I'll try to manage and remove useless photos better.

I'm still working with my last design, making different color versions. I just added some glitter to the lentil tiles from the piece I made earlier. I found these simple and small pieces to be the most difficult to work with, since any mistakes lead to faulty results.


Do you like these beads?
- Toho Treasures Metallic Rainbow Iris #TT-01-86
- CzechMates Lentil beads 6 mm Saturated Metallic Valiant Poppy and Transparent Bodacious
If you want an earrings kit, just drop me a private message! Soon, a small beginner kit will be available in the ShilaBead Shop!


15.12.24


It was a very long process, but I have finished the five warped squares for five rays of a 3D star. I'll show you the finished piece soon, too.
 

11.12.24


I had to stop the last Christmas star design because I wanted to make another design for my friend's birthday. I chose a traditional Christmas color combination because it matches her holiday decoration. Below is the pattern I chose for LadyLunarCat.


30.10.24

Many blessings for good vibes and positive energy and, of course, for a click on the ads on the right or below. Or anywhere ;)
Love,
Shila

Two warped square components are done ;)


I want to share some advice about this 3D star ornament pattern and the process.

About the pattern:
The pattern, crafted by JuliaPatternUA, stands out with its unique, eye-catching color choice. However, using primarily matted beads softens the traditional festive mood of Christmas, giving it a distinct and modern twist. 
The file contains:
1. The colours of delica beads with numbers and the amount needed for each, not a gram, numbers only. It is easy to count the grams using the following data: 7.2g. contain - depending on the coating of the beads - 1358 - 1378 beads.
2. The pattern image is very blurry, so you can't coordinate it with your piece if you are finished. The photo shows only the dividing lines between the warped squares.
3. The word chart of the pattern, for me, has a slightly bothering style of letters. Just an idea: You can memorize five letters together because when you add the beads, you read them don't one by one. That may have made the piece faster.
That's all, no extra words or anything. I like it. With a couple of minor changes, it is enough for me to finish my larrikin piece.

About the thread:
I don't recommend Fire Line for this piece. It is better to use some flexible thread. I used a tan color, but any natural color can be good.
Use nearly 1.2 m of thread, no more and the silicon thread conditioner as often as possible.
If I made a mistake and needed to open more than 10 stitches, I cut the thread and added a new one. 
I secured the tails on the backside.

To be continued......


28.10.24


IMPORTANT!
If you would like to support me in continuing to share the secrets of my beading mat, there is nothing special to do; just please click on the ads on the right or below. Or anywhere ;)
Love,
Shila


The first warped square component is done ;)
I saw at the beginning that this project requires a special beading mat. I purchased it from my favourite delica bead supplier: www.threadabeads.com where you can find several color and design versions. You can make your piece without it, but it's much slower. It was an excellent choice. The cream-colored Vellux Bead Mat has marked (up to 26 colors) curved felt compartments. In addition, there are larger compartments too, so you can fill larger amounts of beads more closely for your hands. In the first picture, you can also see how I arranged the beads after a few steps.


27.10.24

IMPORTANT!
If you would like to support me in continuing to share the secrets of my beading mat, there is nothing special to do; just please click on the ads on the right or below. Or anywhere ;)
Love,
Shila


There are sometimes difficult times in our lives when you don't want to think about anything, but creating something would still be exciting and relaxing. Well, this is what I have now. I thought the best was a pattern that only needs to be followed and takes time. Anyway, I also wanted to try it a very long time ago. If you are interested in the process of making a peyote-beaded star, come with me on this exciting journey.
So, here is a pattern from Etsy, designed by JuliaPatternUA. I think it will be a lovely Christmas present, and I just want to finish it before then.
To be continued......


13.10.24

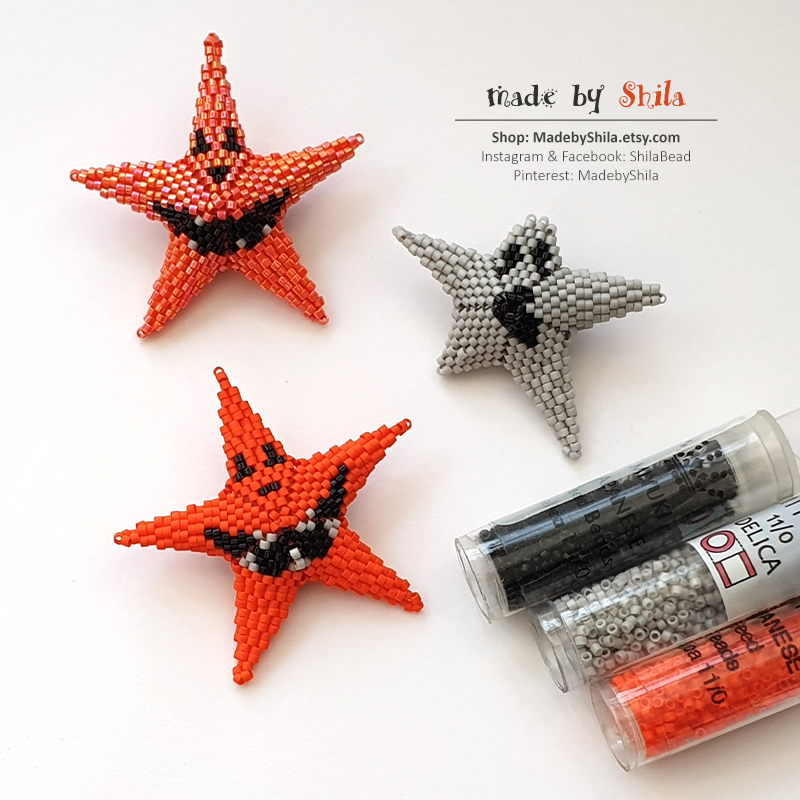
Guess how many times I need to create these Spooky Stars to complete the PDF?


8.10.24

Spooky Stars are coming ;) Till then, you can browse in ShilaBead Shop: